WordPress is a blogging application ready to use and have popular in the Blogger among in the world. Not only easy to use, many good plugins, which you can install to embellish the Blog, is also one of the reasons why WordPress so popular.
In the tips and tricks this time, let’s learn to install the widget. It’s one of the most preferred features Blogger in WordPress with various goals. The Widget installation is not too difficult, WordPress capable to executing widget tag form of html, text or script.
How do all it can be done in WordPress? Let’s see the steps as follows:
- As usual, we handle it in the Dashboard blog (as control panel in WordPress). Sign in to the Admin page using the username and password that you have once previously registered. Make sure you are in the Admin page in your own blog.
- Next we go to Presentation -> Widgets (widgets is available if the template you use allows to install a widget, if not, you can not install a widget in your blog).
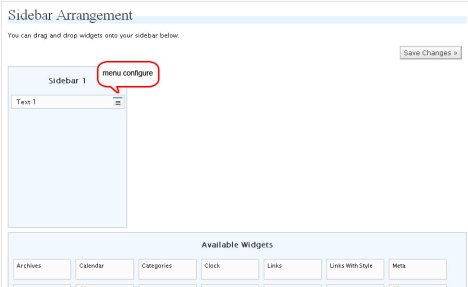
- Then set the widget with drag (pull) use by mouse on the available widget on in the bottom of the box to the name sidebar 1. If successful, the widget was a drag will be moving from place to the bottom of the box name Sidebar 1. Select the widgets anywhere you want, and set the position.
- For widgets with html tags, how is:
- Select widget with the name Text 1. Drag the widget to the box with the name of the sidebar 1.
- After widget Text 1 move to the Sidebar 1. click Configure, the menu can be seen as the image below:
 * Then will appear Pop-Up with two empty boxes. Top box is for the title Widgetnya (eg: Official widget). The second box is to enter the html code.
* After entering the html code, click the X button on the pop up and then click save changes.
* Done. Check back your blog, what is widget installed has appeared.
Filed under: blog, internet | Tagged: blog, tip, trick, widget, wordpress | 1 Comment »


